Brief Summary
This course is a fun and easy way to learn to sketch cars in Photoshop. With four engaging lectures, you'll master proportions, rendering, and details, plus get cool bonus tools to enhance your skills. Perfect for anyone wanting to dive into car design!
Key Points
-
Learn easy car sketching in Photoshop without fancy tools.
-
Four detailed lectures covering proportions, rendering, details, and color.
-
Bonus materials include brush sets and extra lectures on perspectives and wheels.
Learning Outcomes
-
Draw a professional-level car sketch in Photoshop.
-
Quickly get the car proportions right with two techniques.
-
Render and shade using standard Photoshop brushes like a pro.
-
Add sharp colors and details to make your design shine.
-
Sketch wheels correctly, getting the perspective just right.
About This Course
Car Design Sketching: Learn the easy way to sketch and render a car in Photoshop without advanced Photoshop tools.
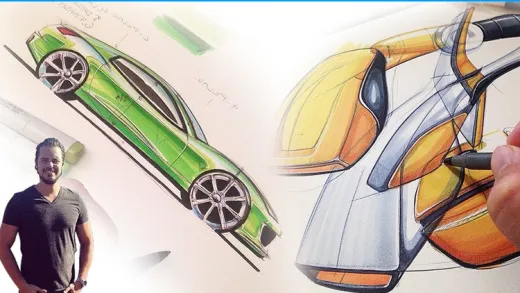
Join over 1400 students in this action packed video course on car design sketching using Adobe Photoshop and a Wacom tablet.
Are you just starting out with sketching cars in Photoshop? Or are you an automotive design or industrial design student or professional? This course will help you improve your sketching skills which is of great value when building a professional portfolio. I'll walk you through each step of the design sketching process from initial line work to the final render and give you an insight to how it's done in the design industry.
The course is divided into 4 lectures.
In lecture 1 we go over two different techniques on how to get the proportions of the car down. The reason for this is because without correct proportions from the start, it might end up looking like a toy car.
In lecture 2 we'll make the car come alive by rendering and sculpting the design. I'll walk you through the basic tools and brushes used for this.
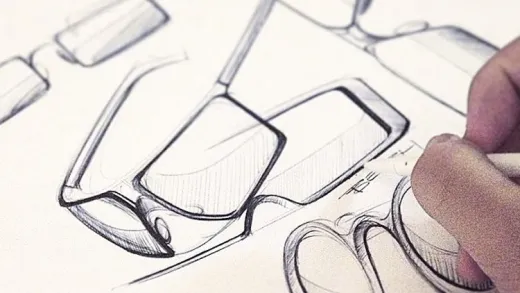
Lecture 3 is about adding the details such as parting lines for the door, import wheels from a picture and refine the reflections and highlights.
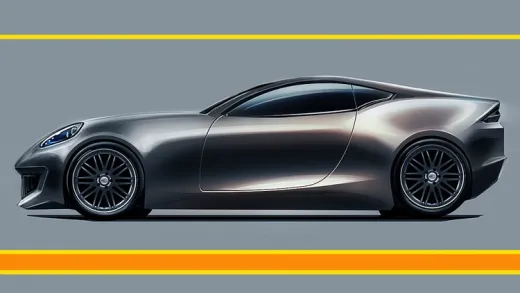
In the final lecture 4 we'll add color to the design and I'll show you the difference between using a couple of layer modes to get the result that you want. You will also learn a trick to make the final image really stand out and feel crisp and sharp.
As a bonus lecture you'll get
1, The brush set that I use for Photoshop
2, The original .psd file so you can open it up on your computer and see the layer structure and what goes in every layer.
3, Two additional lectures on how to sketch a car from an upper side POV. This is important to learn and used often, especially for automotive design students.
Bonus lecture 2
Downloadable this .pdf with a step by step walk through on the techniques used to sketch a car in side view using markers and pens.
Bonus lecture 3
Having problems sketching wheels? Not anymore! Check out this bonus video lecture on how to sketch wheels and get them right in perspective. This will help your sketch tremendously and will make the vehicle look planted on the ground.
Click the "take this course" button and have your own car design rendered 2 hours from now
Produce a professional level sketch of a car in Photoshop
Learn two different techniques on how to get the proportions of the car fast
Use only standard PS brushes to sculpt and shade the design as it's done in the industry


Arjun V.
Very informative. Just hope that he can teach us whether the same tools can be used even in alternatives to adobe photoshop.. for instance, I used photo pea and I couldn’t find some of the tools which the professor used. Other than that, it was very fun!!